This is a guide that details how to use the Routegadget website to practice route selection for a mountain marathon. While Routegadget’s interface is a little old-school, it is a useful and powerful tool for analysing past races. This guide will focus on past races from the SLMM, but this practice is applicable to any mountain marathon.
A first map
First, let’s look at a past course on Routegadget. Follow this link to view the map and controls for day one of the “Harter Fell” course of the 2017 edition of the SLMM. You should see something like this:
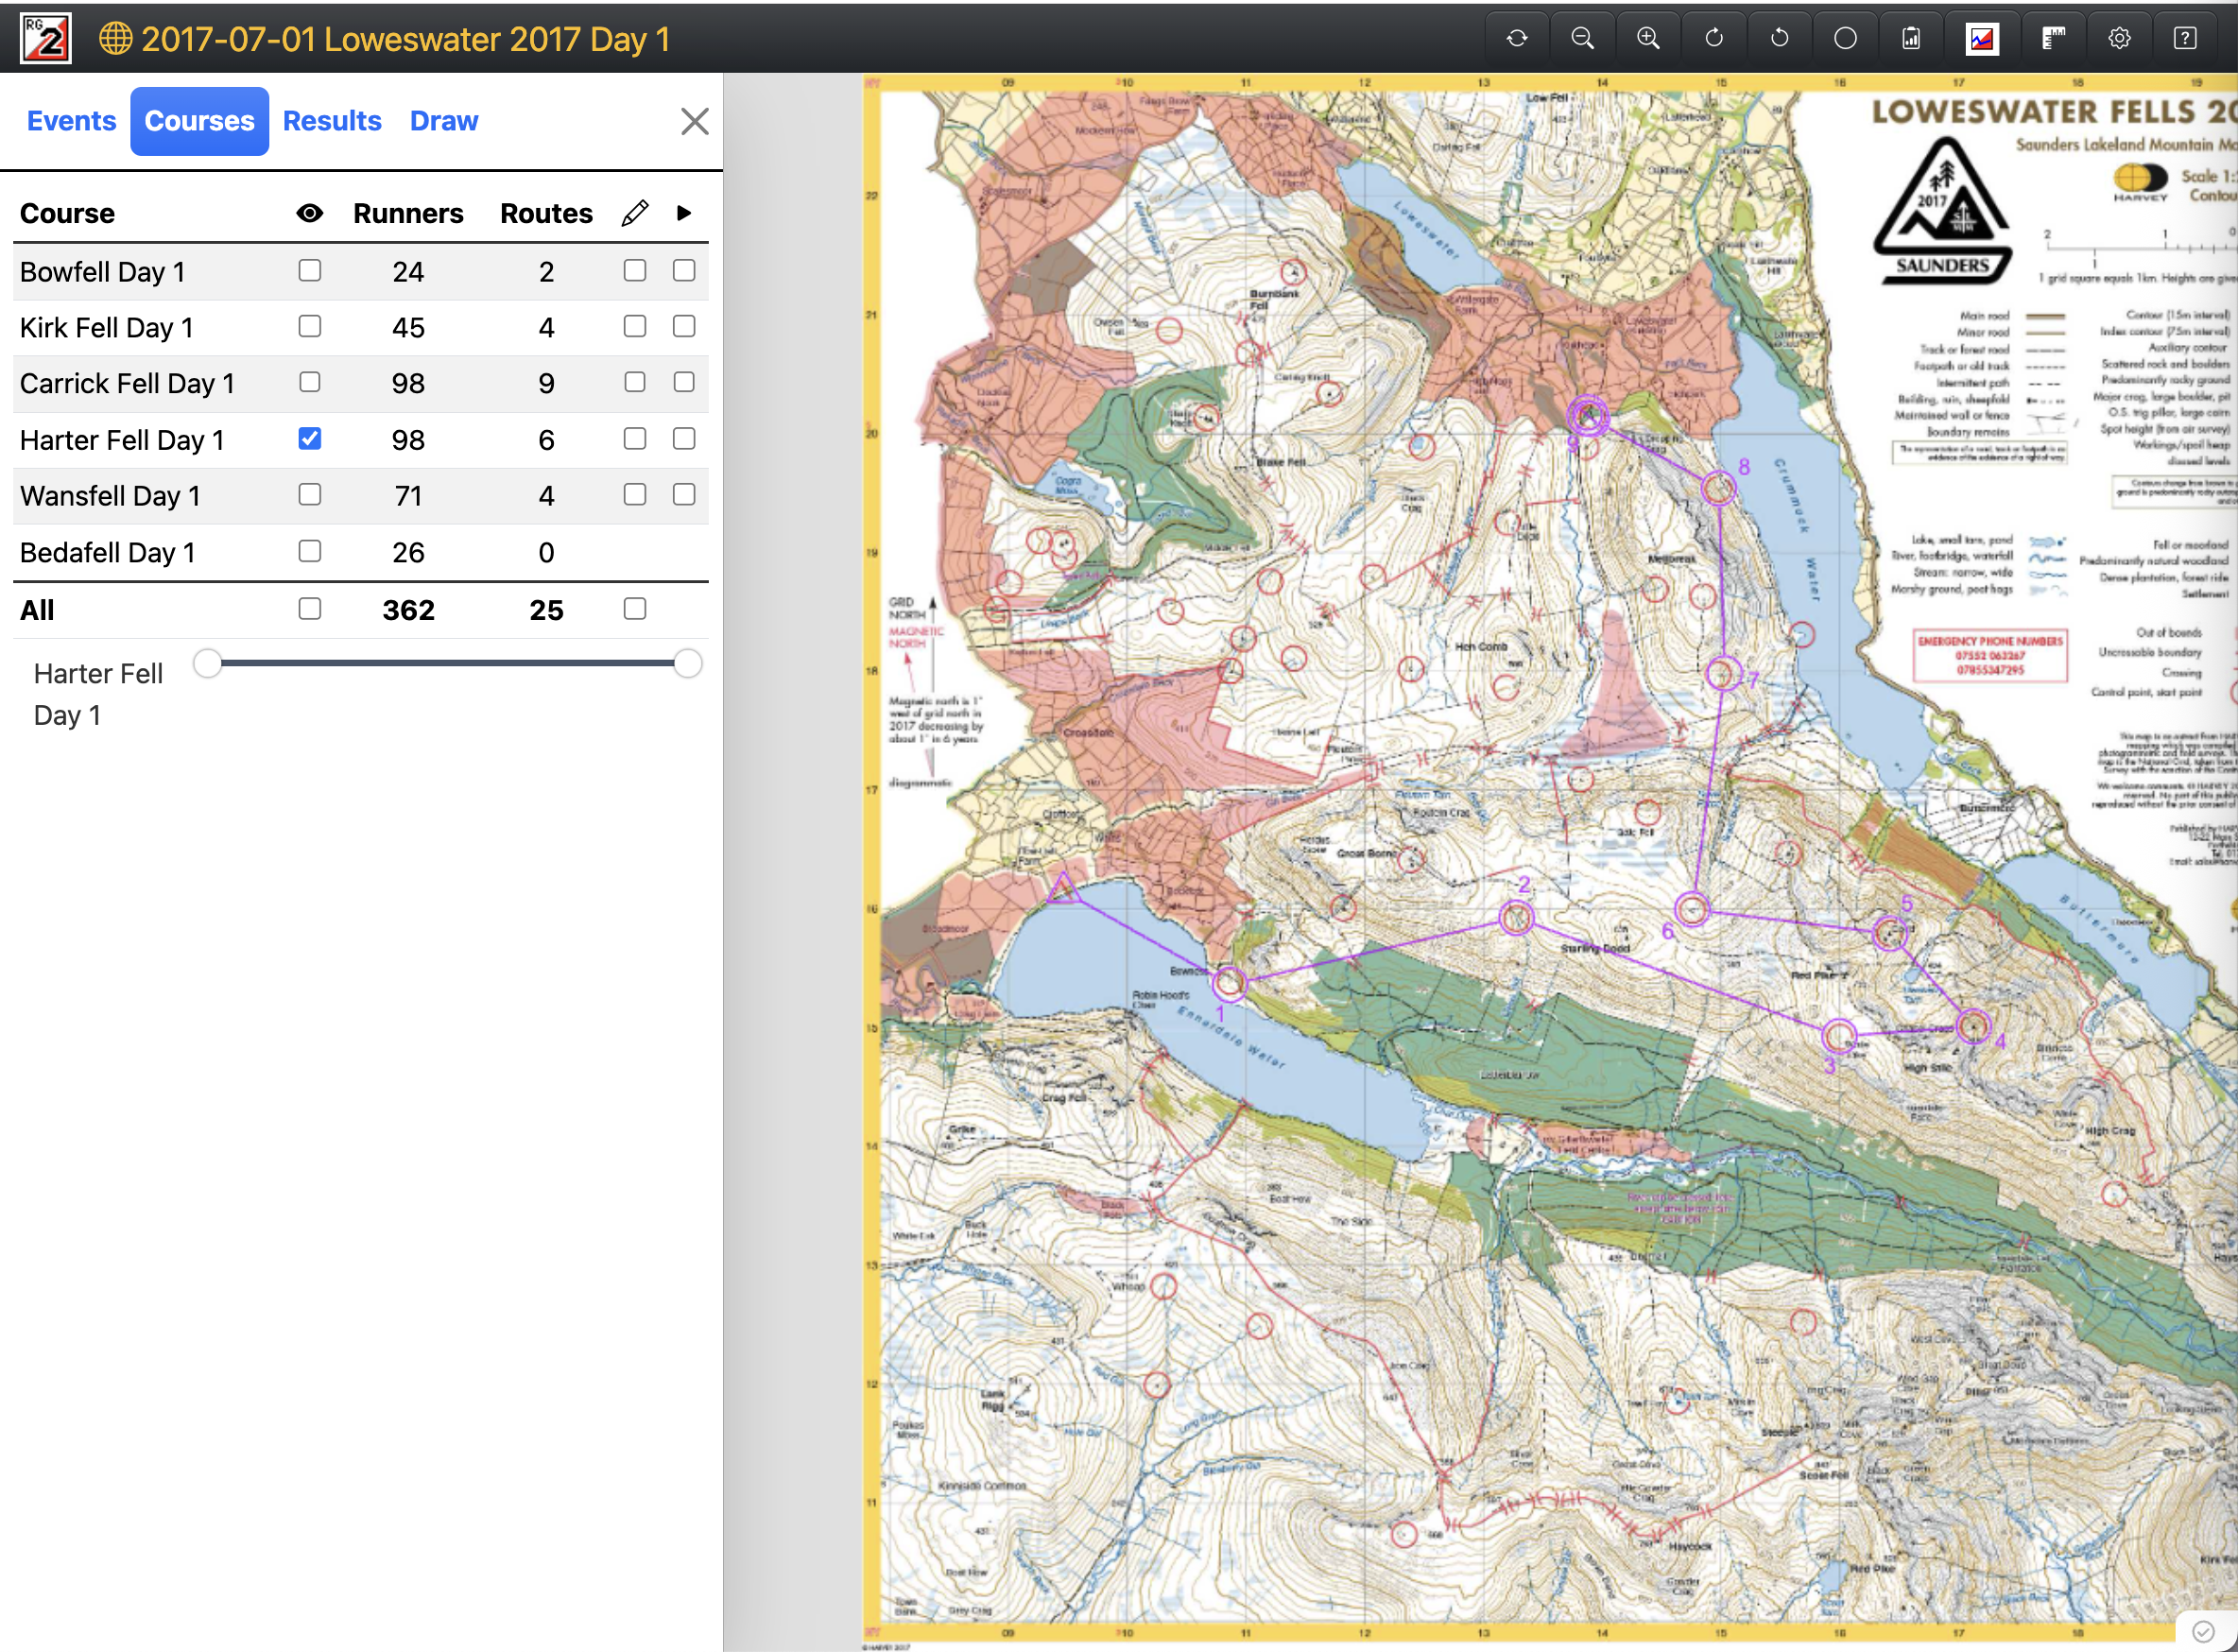
- The purple numbered circles are the controls (this is a fancy orienteering term for a checkpoint) for the Harter Fell course; they must be visited in numerical order to complete the course successfully.
- The red circles are controls for other courses; these controls are not relevant for the Harter Fell course.
- When the map is provided at the start of the event, the controls relevant to your course will not be marked on the map like this; you will be provided with a list of grid references, which you must use to mark the correct controls on your map.
- The purple straight lines show the “as the crow flies” route between two controls. This is almost never the optimal route to take.
Given the straight-line route is not optimal, what is the best route? That’s the key question in a mountain marathon! The optimal route can depend on many factors, including weather conditions, competitor fitness, and willingness to destroy your ankles contouring, but there are some general lessons we can learn by looking at the routes taken by past successful competitors.
A first route
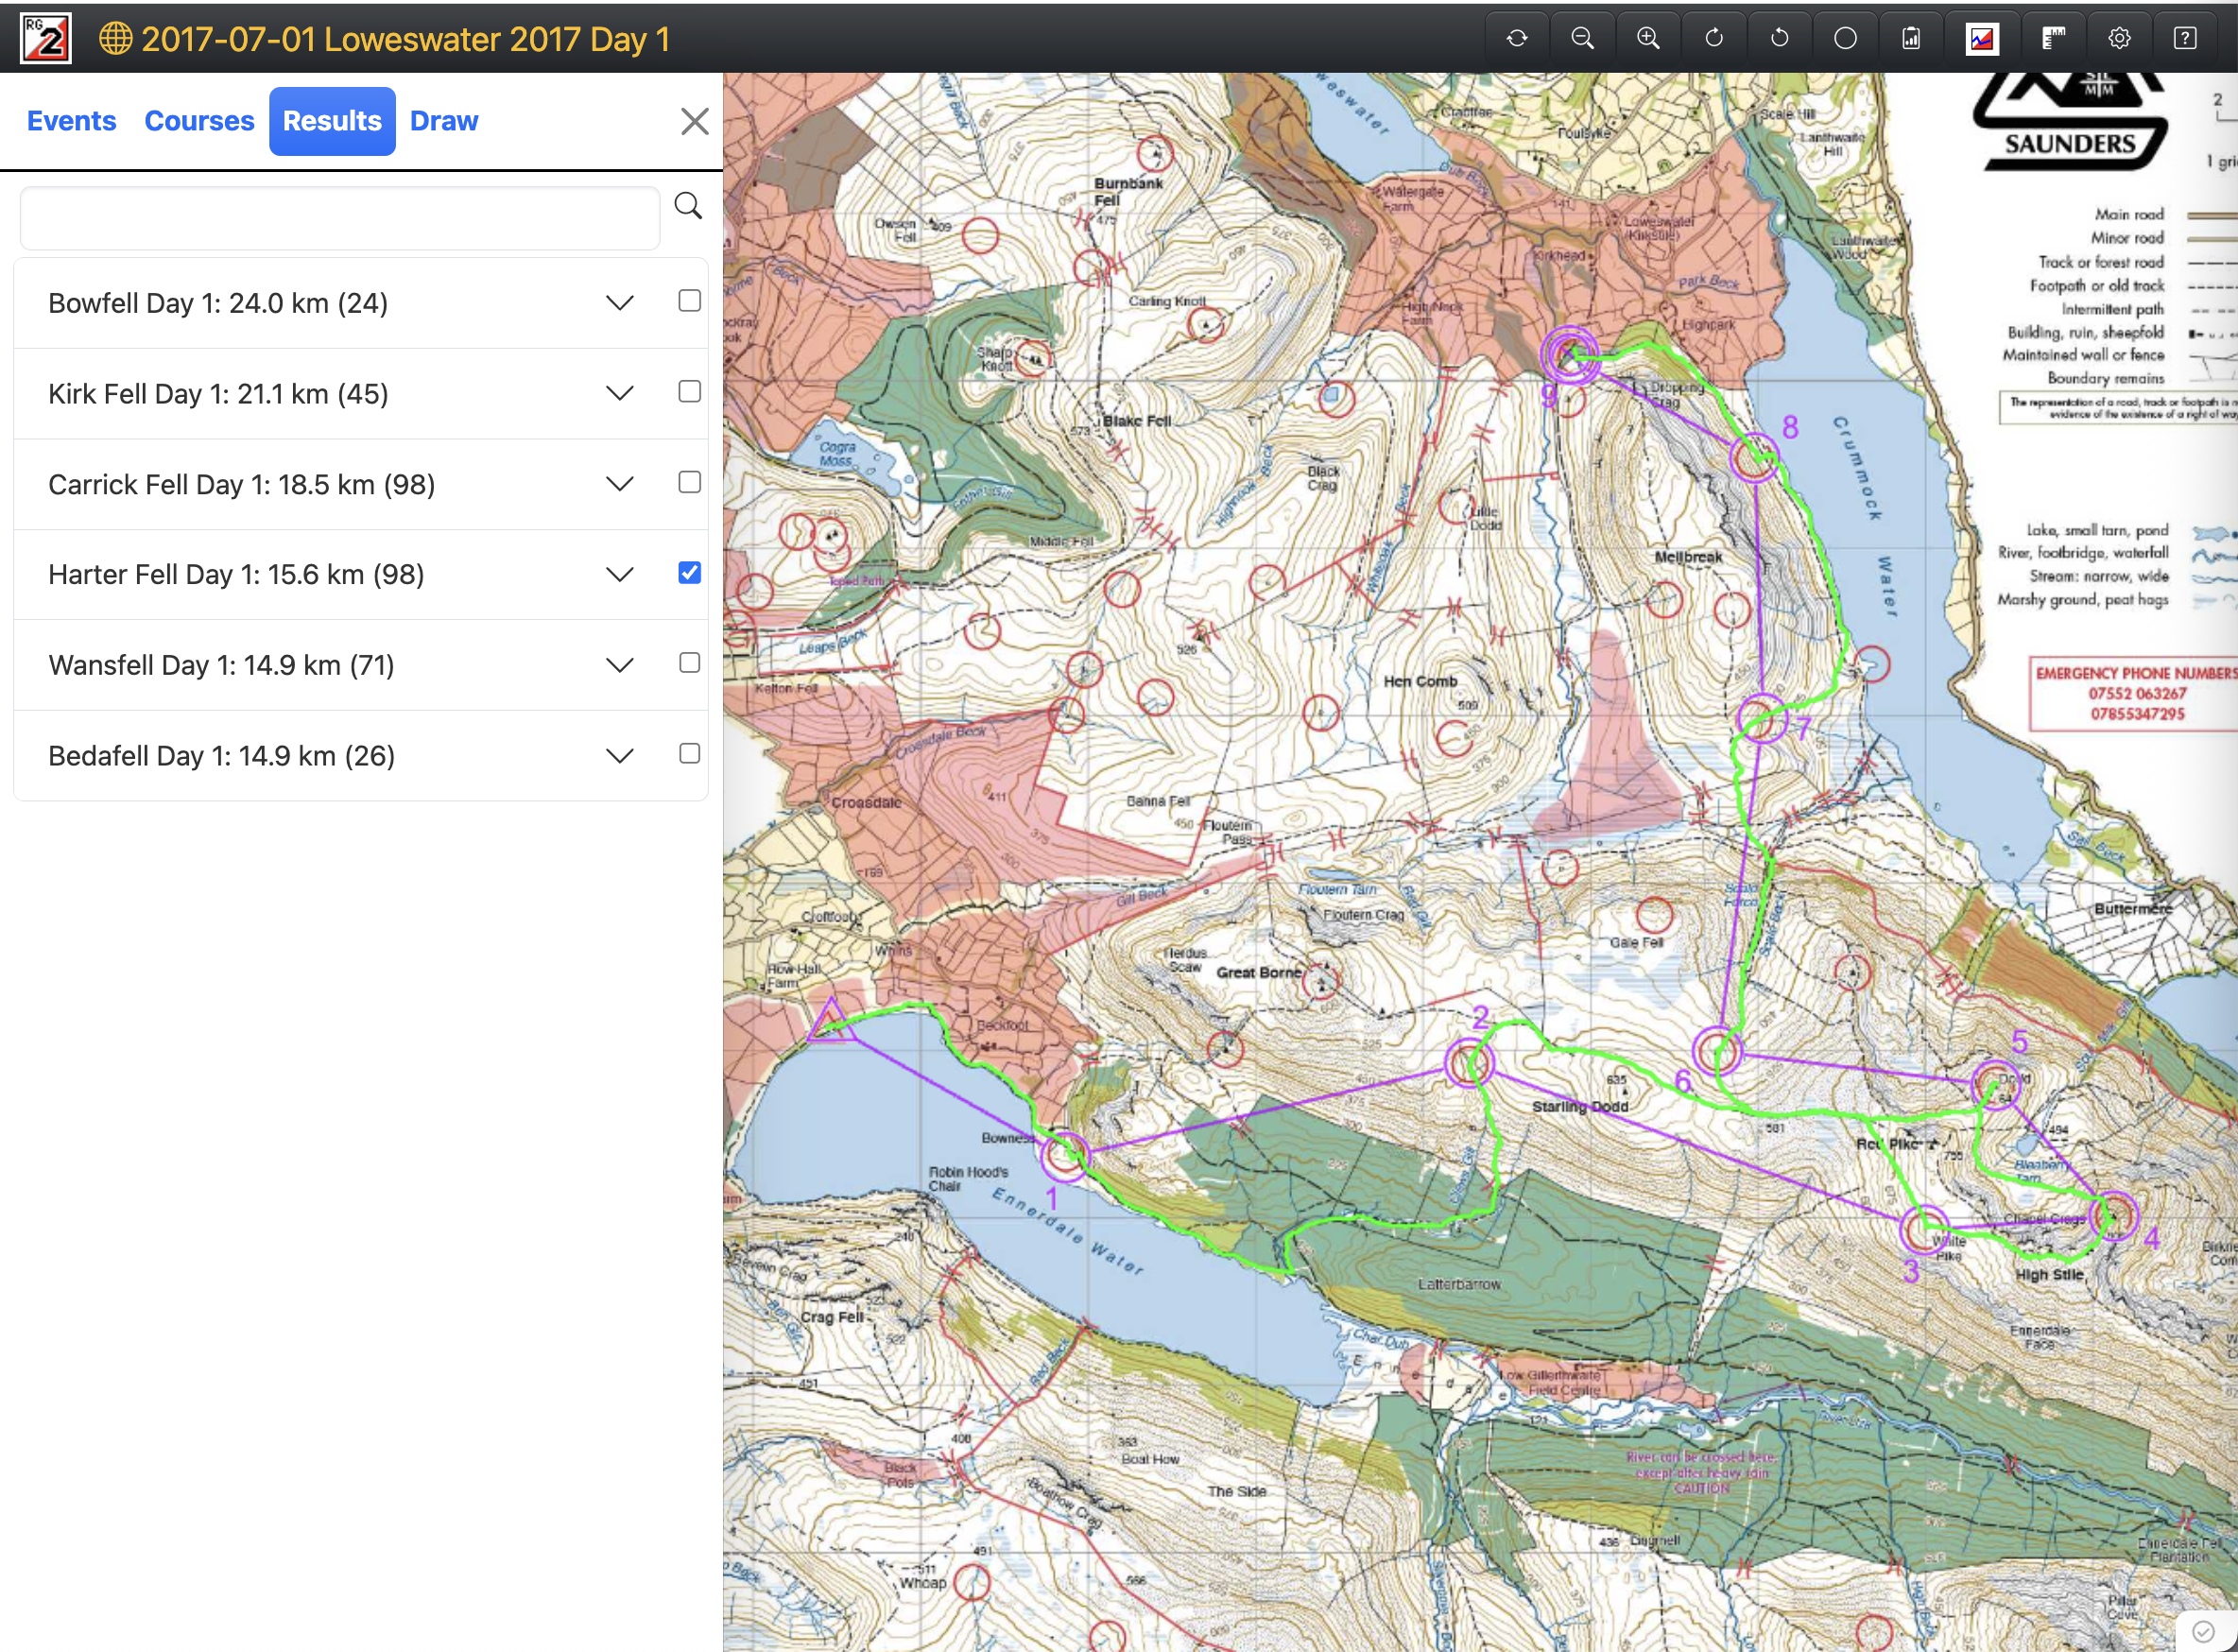
Let’s now look at the route the winning pair (Adrian & Matthew Hall) took. Follow this link to view their GPS track overlaid on the map.1
What should we be thinking about when trying to understand this route choice? Some of the following might be relevant:
- Where do they stick to the paths, and when do they cut off corners?
- When do they choose to contour around a mountain, saving elevation but adding distance, and when do they choose to go over?
- How do they navigate uncrossable boundaries?
- When they leave the path to hit a control, at what point do they do this?
Looking at places where the choices of competitors diverge can be an interesting way to understand decision-making. This link additionally shows the route taken by the 17th-place pair. While they are largely the same, there is an interesting divergence around controls 4-5.
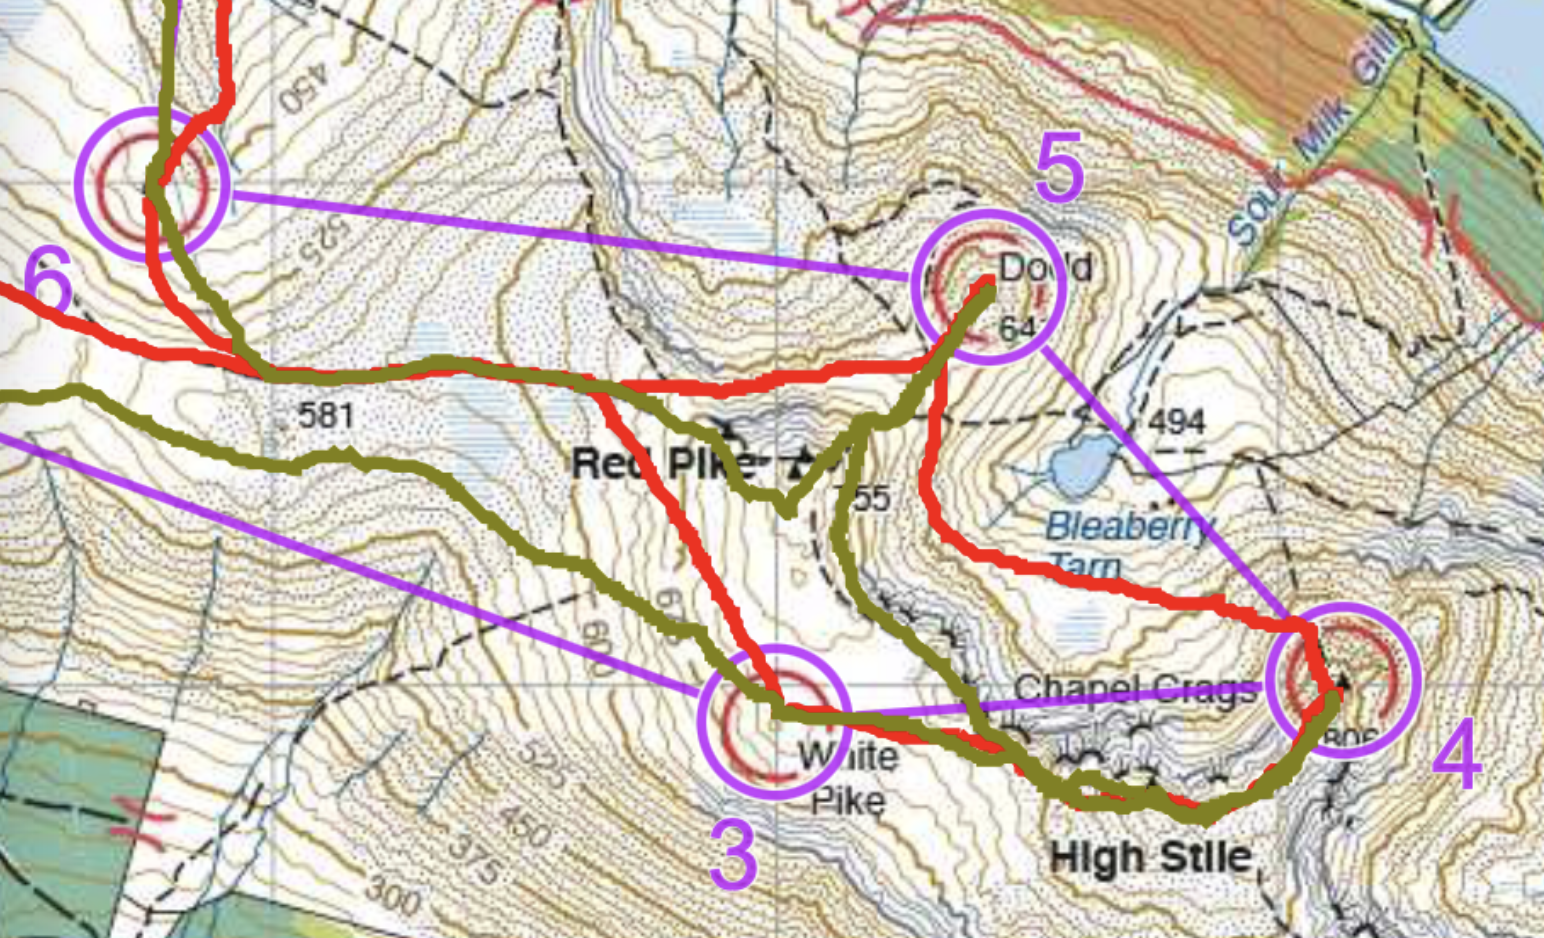
We can see that the winning pair (in red) go off the path between the controls, saving elevation but contouring on very steep terrain, whereas the 17th-place pair (brown) went back on the path. This was likely a fast but physically challenging choice; whether it saved time would be contingent on the ability of the pair to cover that terrain quickly.
Unfortunately, there is no easy formula for choosing a route, and much of it comes with experience. We can, however, get a bit of virtual experience by going through some other courses and plotting our own routes.
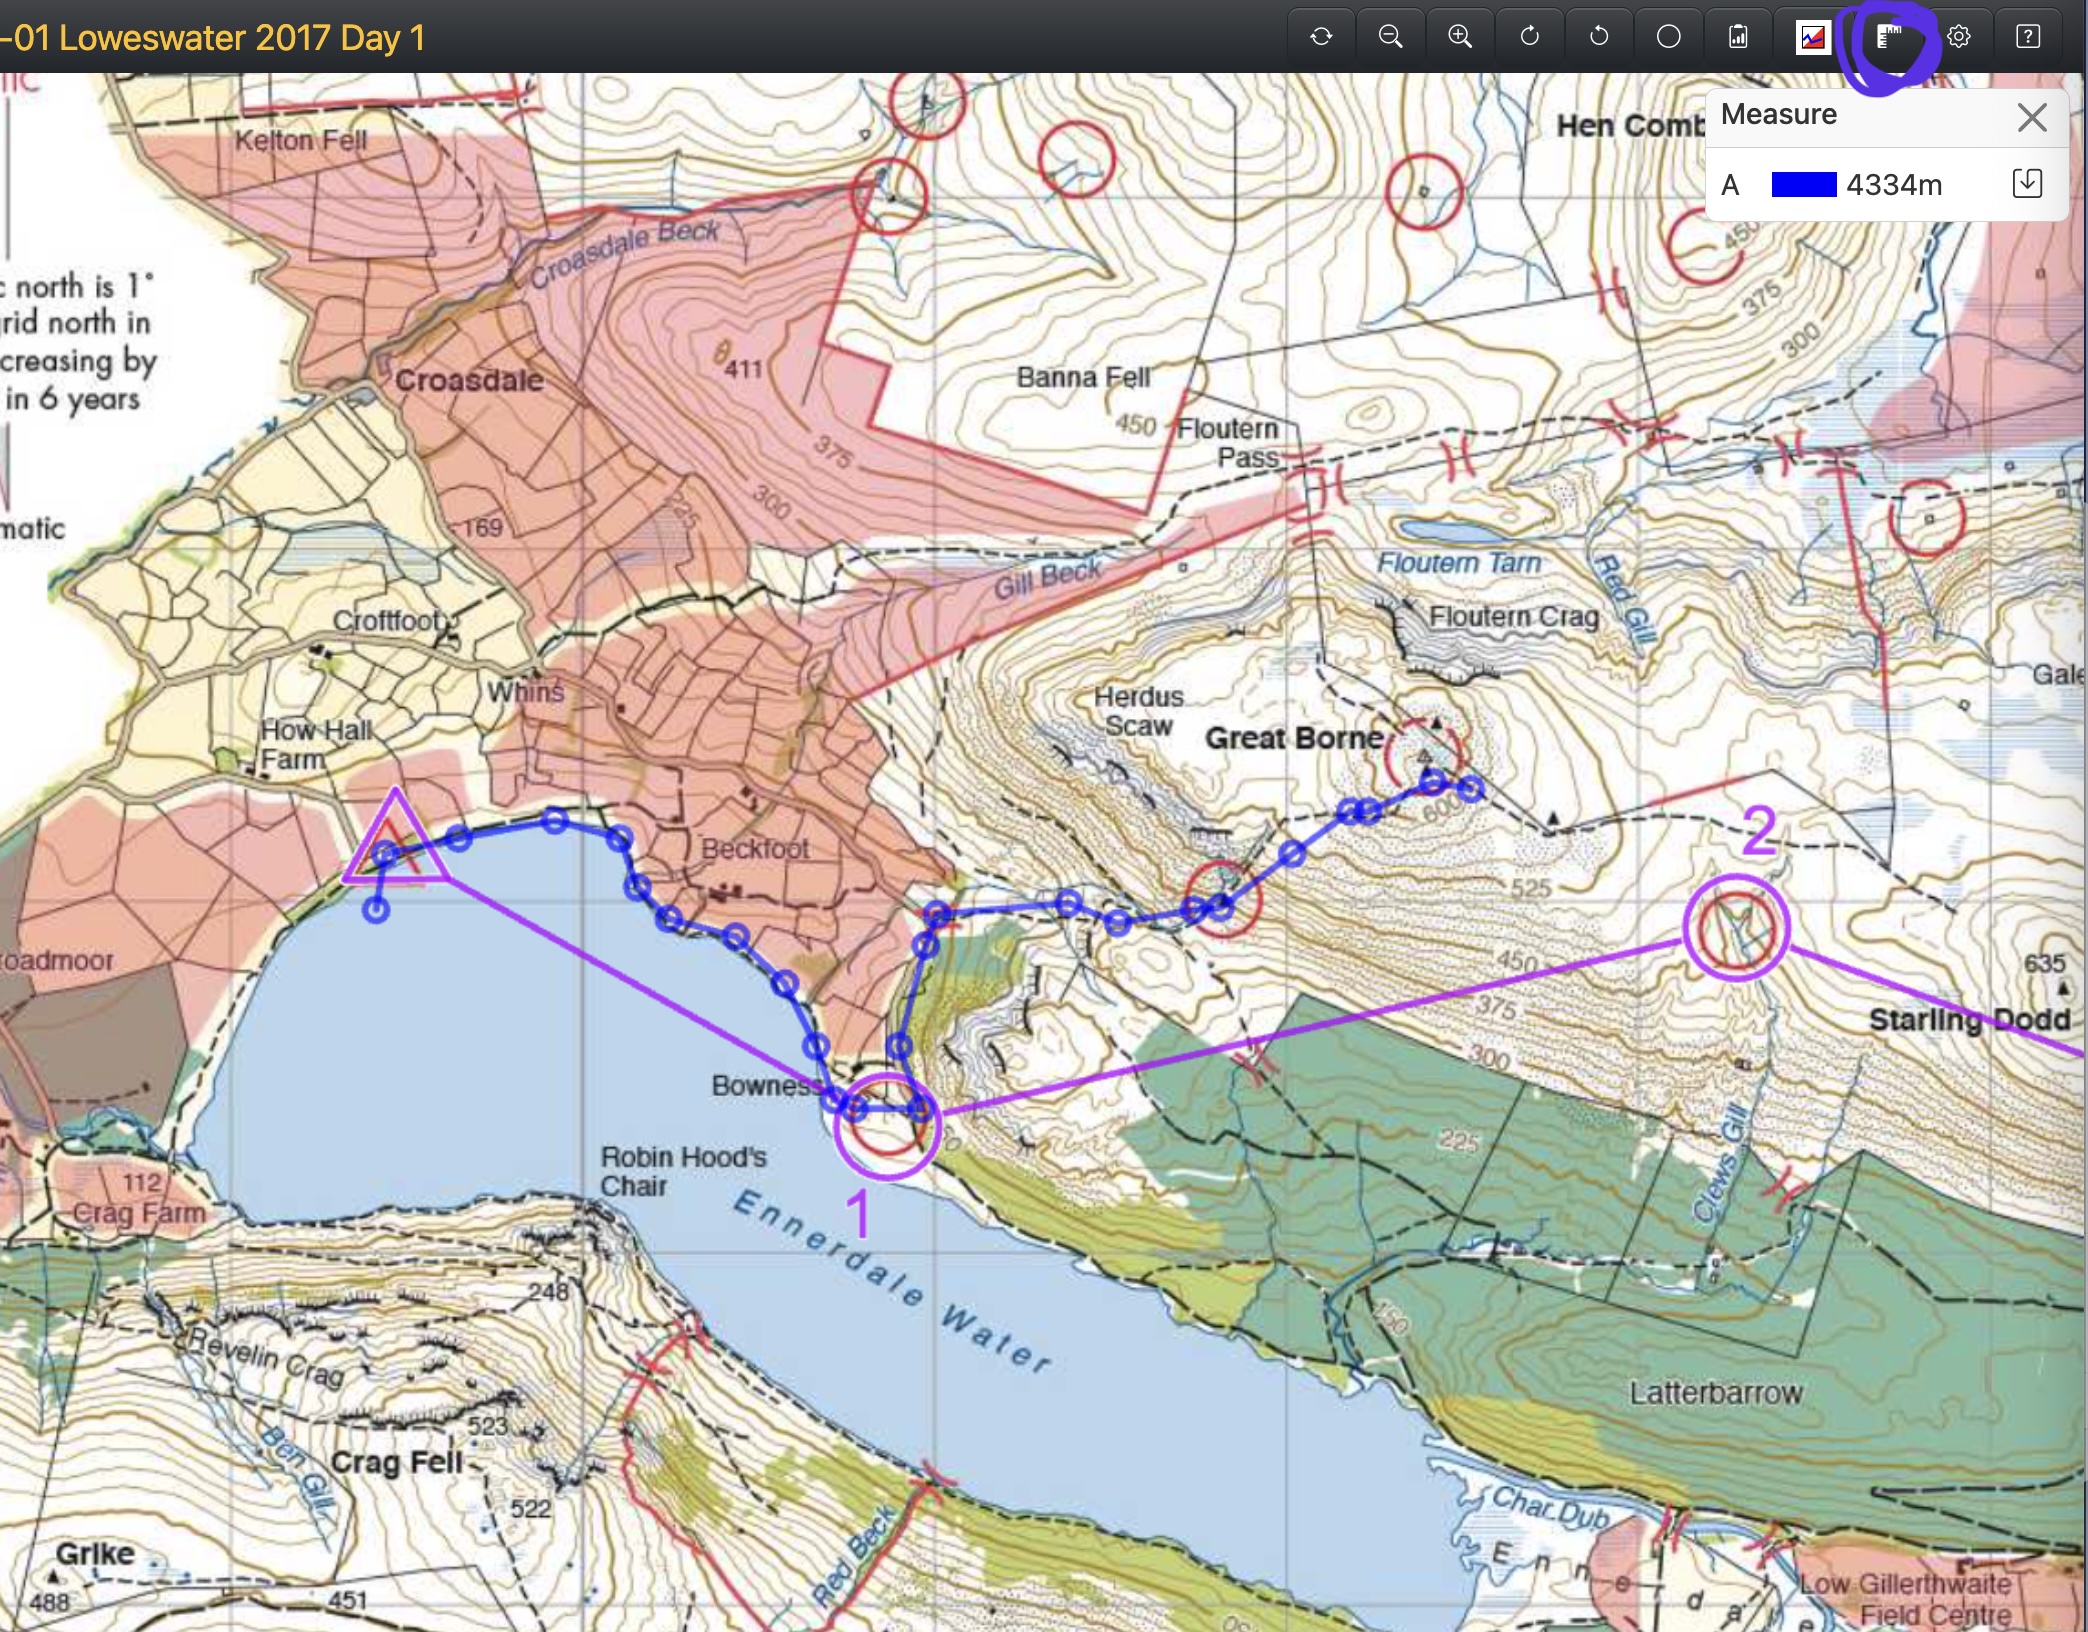
The measure tool
Clicking on the ruler icon in the top left corner of the interface gives you access to the measure tool. This allows you to plot your own route on the map and compare it with the competitor routes. Clicking once the tool is activated adds points that are linked with lines. The screenshot below shows a route I have started building with the tool. The icon to activate the measure tool is circled in the top right.
The Test
Now that you know how to create your own route, the best way to practice is to load up some maps, try to create a route, and then compare it with the routes the actual competitors took. Below are some links for base maps with controls that you should use to create your route, and then the “answer,” showing the routes some of the top pairs took for that course. After you have created your route, click the answer and compare. Keep in mind that there is no single correct answer, and different routes may make more or less sense for different people. Here are 5 to try for yourself:
- Day 2 Harter Fell 2017
- Day 1 Carrock Fell 2018
- Day 1 Harter Fell 2018
- Day 1 Wansfell 2021
- Day 1 Scafell 2023
If you managed to do all those (including the last mega one!), then well done! You should be well prepared, at least in a virtual sense. One final thing to keep in mind: out on the fells conditions change in an instant!
More Resources
The following resources are great for learning more about mountain navigation, route choice, and mountain marathons in general:
- General guide to MMs.
- SLMM guidance for beginner competitors.
- Great technical mountain navigation guide.
-
The track is green on the image here but may be a different color for you, it seems to change randomly each time the page is loaded. ↩︎